

AC Installation Process: Step-by-Step Guide for Split and Central Systems
A new AC installation process includes an initial inspection, proper sizing of the unit, setting up the condenser, connecting refrigerant and condensate lines, and a final system test.
These core steps apply to both ductless split system AC and central HVAC systems, though each type has its own specific requirements.
This air conditioner installation guide breaks down the installation process for both systems, so you know exactly what to expect when you schedule a service. For more information, contact Air Control Services at 575-567-2608. Our technicians are available in Las Cruces, NM, and the surrounding areas.
Ductless Split System Air Conditioner Installation Procedure
A ductless split system air conditioner installation process involves inspecting the space to select appropriate unit sizes and locations, securely mounting the indoor unit, and placing the outdoor condenser on a stable surface with proper airflow clearance. The technician then runs refrigerant, electrical, and drainage lines between the units, connects and seals all components, vacuums the lines to remove moisture, and checks for leaks. Finally, the system is started and tested to ensure optimal cooling performance and proper thermostat operation.
Let’s break down the steps below.
Step 1: Inspection and Choosing the Location
The split AC installation begins with a thorough inspection of the space. The technician determines the correct size of the unit and chooses the best wall location for the indoor unit, along with a suitable outdoor spot for the condenser.
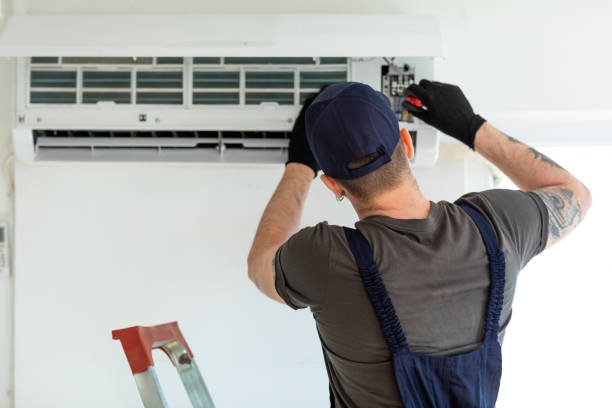
Step 2: Mounting the Indoor Unit
We secure the bracket firmly to the wall and mount the indoor unit. A small opening is drilled through the wall to provide access for the refrigerant lines, electrical wiring, and condensate line.
Step 3: Installing the Outdoor Condenser
The outdoor condenser unit is set on a stable concrete pad or mounted on brackets. Proper placement ensures steady operation and enough clearance for airflow.
Step 4: Running the Line Set
The technician runs the line set, which includes refrigerant piping, electrical cables, and the drain line, through the wall opening to connect the indoor and outdoor units.
Step 5: Connecting System Components
We connect and seal all the components, including the refrigerant lines, electrical wiring, and the drain hose. This secures the operation and prevents leaks.
Step 6: Vacuuming and Leak Inspection
We use a vacuum pipe to remove air and moisture from the refrigerant lines. The system is then carefully checked for leaks before the refrigerant is released.
Step 7: Final Startup and Testing
The final step is starting the mini split air conditioning unit. The technician tests thermostat functions, measures airflow, and verifies that the air conditioner is cooling efficiently.
Central AC Installation Process
The central AC installation process starts with inspecting the home and calculating the correct system size, followed by preparing the indoor unit and ensuring access for necessary connections. The outdoor condenser is placed on a level surface with proper clearance, and refrigerant lines, electrical cables, and a condensate drain are run between the units. Ductwork is inspected, sealed, or installed to ensure even air distribution. Finally, the system is charged with refrigerant, tested for proper airflow and thermostat function, and confirmed to be operating efficiently.
Below, we break it down.

Step 1: Inspection and Choosing the Location
The split AC installation begins with a thorough inspection of the space. The technician determines the correct size of the unit and chooses the best wall location for the indoor unit, along with a suitable outdoor spot for the condenser.
Step 2: Mounting the Indoor Unit
We secure the bracket firmly to the wall and mount the indoor unit. A small opening is drilled through the wall to provide access for the refrigerant lines, electrical wiring, and condensate line.
Step 3: Installing the Outdoor Condenser
The outdoor condenser unit is set on a stable concrete pad or mounted on brackets. Proper placement ensures steady operation and enough clearance for airflow.
Step 4: Running the Line Set
The technician runs the line set, which includes refrigerant piping, electrical cables, and the drain line, through the wall opening to connect the indoor and outdoor units.
Step 5: Connecting System Components
We connect and seal all the components, including the refrigerant lines, electrical wiring, and the drain hose. This secures the operation and prevents leaks.
Step 6: Vacuuming and Leak Inspection
We use a vacuum pipe to remove air and moisture from the refrigerant lines. The system is then carefully checked for leaks before the refrigerant is released.
Step 7: Final Startup and Testing
The final step is starting the mini split air conditioning unit. The technician tests thermostat functions, measures airflow, and verifies that the air conditioner is cooling efficiently.
Central AC Installation Process
The central AC installation process starts with inspecting the home and calculating the correct system size, followed by preparing the indoor unit and ensuring access for necessary connections. The outdoor condenser is placed on a level surface with proper clearance, and refrigerant lines, electrical cables, and a condensate drain are run between the units. Ductwork is inspected, sealed, or installed to ensure even air distribution. Finally, the system is charged with refrigerant, tested for proper airflow and thermostat function, and confirmed to be operating efficiently.
Below, we break it down.
Step 1: Pre-Installation Inspection and Sizing
The central AC installation begins with a full inspection and a sizing calculation. This ensures the air conditioner is the right size for the home’s square footage, insulation, and cooling needs.
Step 2: Preparing Indoor Access and Components
Our technicians set up the indoor air handler or furnace with an evaporator coil. They also make sure there is clear access for refrigerant lines, condensate drains, and electrical connections.
Step 3: Installing the Outdoor Condenser Unit
We place the outdoor condenser unit on a level pad with adequate clearance for airflow. This helps the unit function optimally and makes future maintenance or repairs easier.
Step 4: Running Refrigerant Lines and Condensate Drain
We run the refrigerant lines, electrical cables, and the condensate line between the indoor and outdoor units. All connections are sealed to prevent leaks and ensure smooth operation.
Step 5: Connecting Ductwork and Air Distribution
We inspect and seal the ductwork if it is already in place. For new HVAC systems, we install ducts so they can distribute air evenly across all rooms and areas.
Step 6: System Startup and Final Testing
The final step is to charge the system with refrigerant, test the thermostat, and measure airflow. Our HVAC technician verifies that the air conditioner starts correctly, meets your comfort needs, and is ready for long-term use.
AC Installation Costs: What Homeowners Need to Know
AC installation costs depend on the type of system, the size of the home, and your unique needs.
For a ductless split system, installation costs are usually lower because it does not require extensive ductwork or large-scale modifications inside the home. Instead, the installation involves mounting a compact indoor unit, setting the outdoor condenser, and running a small line through the wall. This makes the work less labor-intensive compared to central systems.
On the other hand, central AC installation often requires more preparation and higher upfront costs. Along with placing the indoor and outdoor components, technicians may need to design and install ductwork that reaches all rooms and areas of the home.
Contact Air Control Services for a Professional AC Installation in Las Cruces, New Mexico
The air conditioner installation process requires careful planning, correct sizing, and skilled handling of system components.
At Air Control Services, we handle every step of the installation process, from the first inspection to the final system startup. Our team is available in Las Cruces, NM, and surrounding areas to make sure your home stays comfortable year-round.
Call 575-567-2608 to schedule your AC installation service.
Frequently Asked Questions
What is the difference between central HVAC and a split system air conditioner?
A central HVAC system cools the entire home through ducts, while a split system targets one room or a specific floor. Split air conditioning units are ideal for enhancing comfort and improving indoor air quality without requiring major ductwork.
How often should air conditioners be replaced?
Most air conditioners last about 12–15 years. Replacement may be needed sooner if the compressor fails, efficiency drops, or frequent repairs occur.
What size AC unit do I need for my home?
The right size is determined by a professional load calculation, which measures square footage, insulation, windows, and air quality needs. This ensures your air conditioning units cool each room properly without wasting energy.
What happens if a furnace is not cleaned?
Ductless systems are ideal for upstairs bedrooms, additions, or finished basements where ducts don’t reach.
How does indoor humidity affect the performance of an air conditioner?
High indoor humidity makes the air feel warmer and forces the AC to work harder to remove moisture. This can reduce comfort, increase energy use, and put added strain on the system.
Is a heat pump a good alternative to a traditional air conditioner?
A heat pump can both cool and heat your home. In summer, it works like an air conditioner, and in winter, it reverses the cycle to provide heating.